PMA Lab 18-05: Packers and Unpacking
Your goal for the labs in this chapter is simply to unpack the code for further analysis. For each lab, you should try to unpack the code so that other static
Lab 18-05
Your goal for the labs in this chapter is simply to unpack the code for further analysis. For each lab, you should try to unpack the code so that other static analysis techniques can be used. While you may be able to find an automated unpacker that will work with some of these labs, automated unpackers won’t help you learn the skills you need when you encounter custom packers. Also, once you master unpacking, you may be able to manually unpack a file in less time than it takes to find, download, and use an automated unpacker.
Each lab is a packed version of a lab from a previous chapter. Your task in each case is to unpack the lab and identify the chapter in which it appeared.
The files are Lab18-01.exe through Lab18-05.exe.
Notes
This is an interesting challenge, to which I would like to extend the difficulty, and increase realism.
- As recommended in the Lab guide, using automated unpackers won’t help learn the required skills, so I won’t be using any automated tools.
- As per the Lab guide, each lab is a packed version of a lab from a previous chapter. However, I won’t be checking one by one or fully analyzing the code on each file just to see if I remember the exercise. Instead, I will expand some of the content that is not necessarily covered in Practical Malware Analysis.
- In this exercise we already know that all files are packed, however, in real scenarios we don’t. Here I’ll briefly analyze each file and confirm how one could get to the conclusion that they are packed, and which packer is used. From there, I’ll start the unpacking process.
Unpacking
Using PEStudio, it is possible to find out that this file is packed with Upack v0.36.
- The file has a very high entropy (7.929)
- Regarding sections there is a section without name and two seconds with random names.
- There are several strings, but the majority are irrelevant.
- Tools such as PEStudio, or DiE were unable to see the imports of this sample. And for sure the Malware will resolve the APIs dynamically using LoadLibrary, and GetProcAddress, which are among the strings.
Unpacking
As with any case, after confirming the sample is packed, let’s unpack it.
Following the instructions on Chapter 18, regarding WinPack and UPack, a breakpoint has been set in GetProcAddress.
Once this breakpoint is set, if we “execute till return”, and then step into the ret instruction, we will be able to see that GetProcAddress has been called using a “call ebp” instruction at 00408EB2:
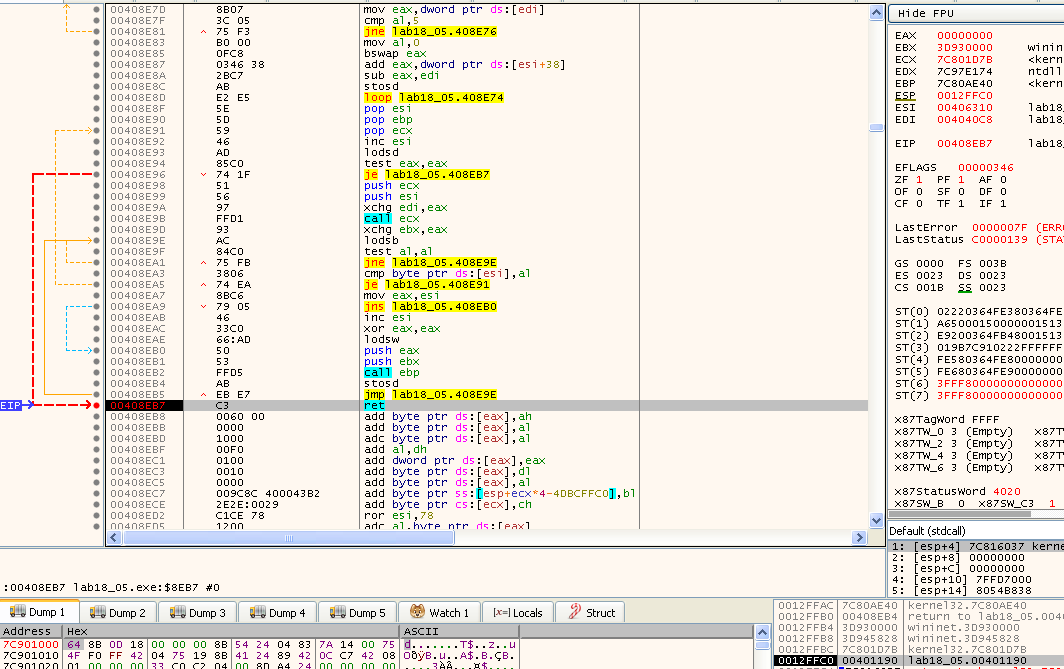
Also, as it is possible to see on the left side of the window, that instruction is in the middle of a loop. By placing a breakpoint outside of the loop (ret instruction at 408EB7), and removing the breakpoint on GetProcAddress, we can easily skip the loop and place EIP at the ret instruction. If we look at the top of the stack (on the bottom right corner of the previous image), we have the address 0012FFC0, which holds the value 00401190. This is the address to which the ret instruction will return to.
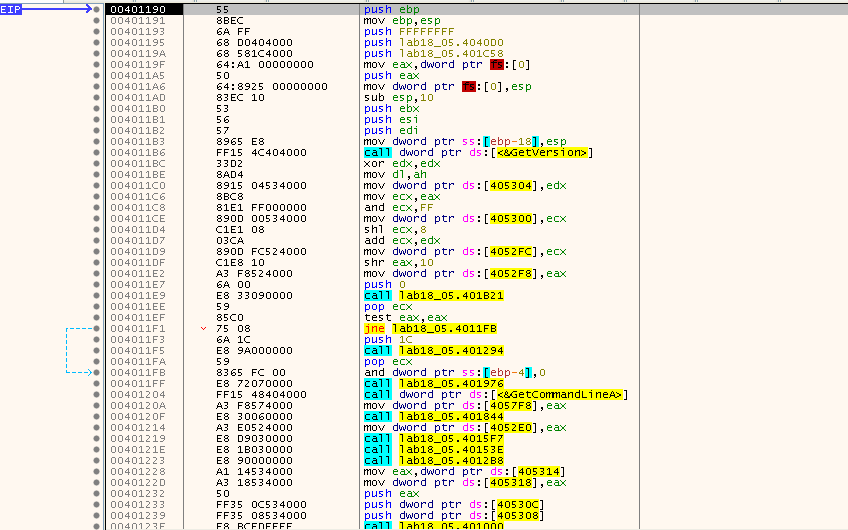
Looking at that address, we find a perfectly readable disassembly showing a Windows program entry point stub, meaning that we found OEP:
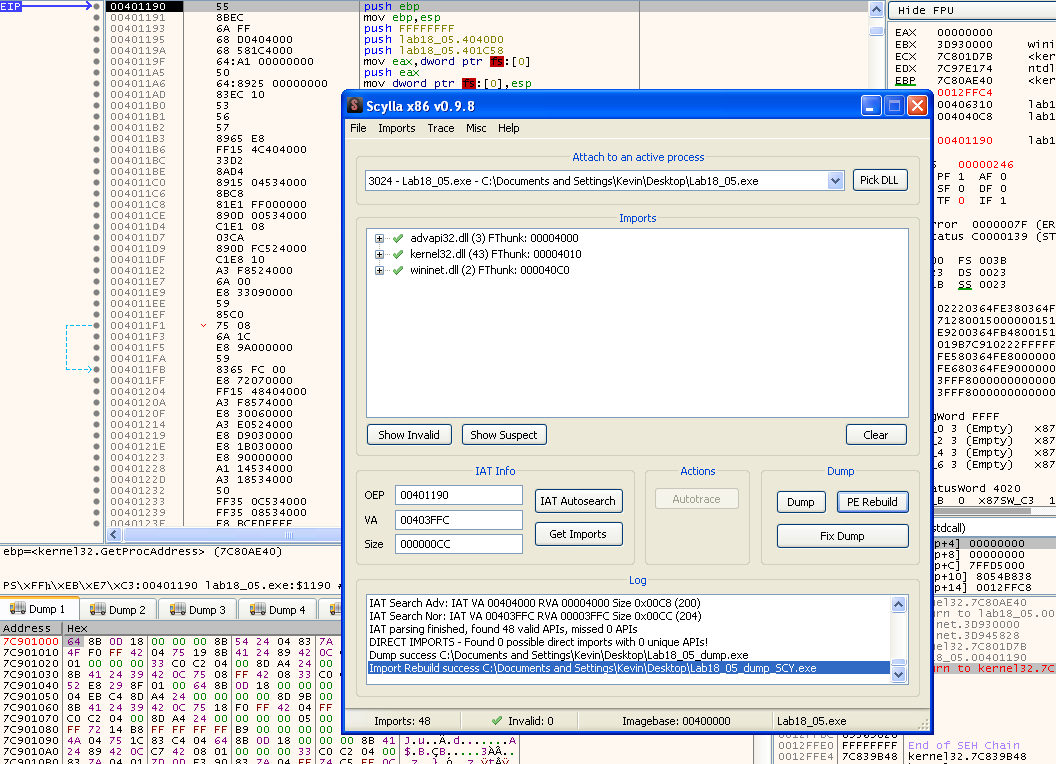
Once again, Scylla can help us dump the program and rebuild the IAT:
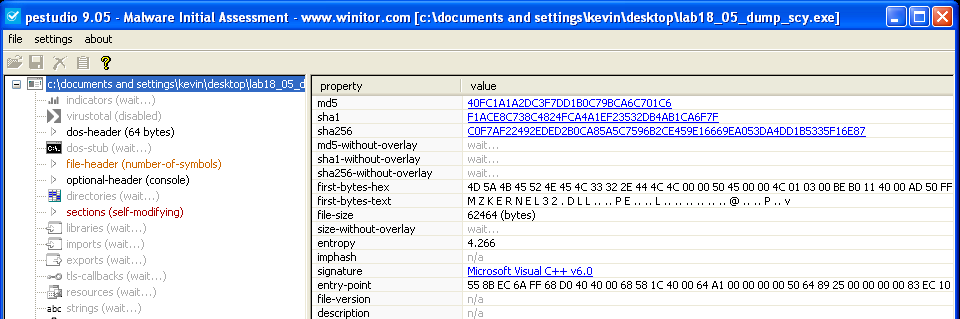
After dumping the sample, as expected, there’s no sign of it being packed anymore:
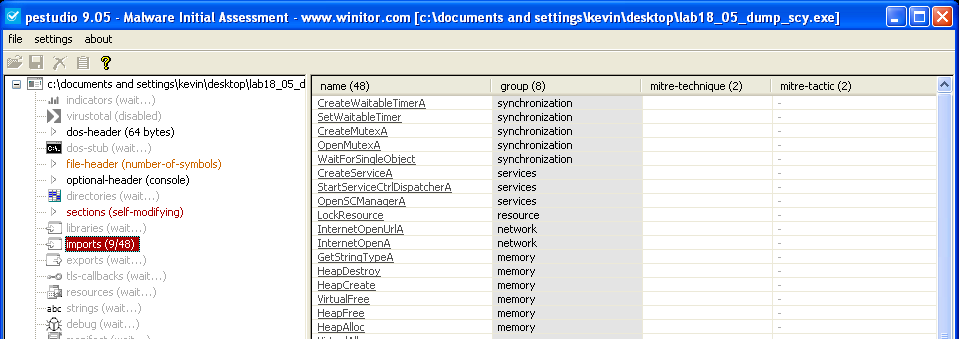
No problems reading the Import Table anymore:
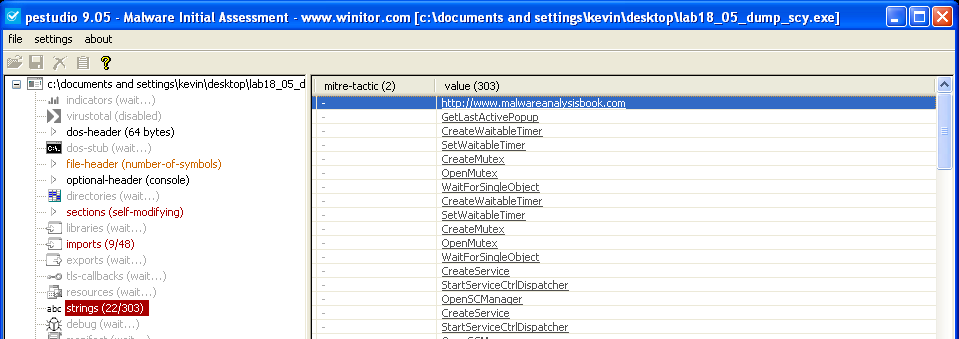
And, also there are some interesting strings:
There was no problem also in running the unpacked sample:

Finding the original sample
In order to find out the original Sample I’ll stick to the method I used in Lab18-01. I’ll start by using ssdeep to compare the unpacked sample against the entire PMA Sample dataset, and find the likely candidates:
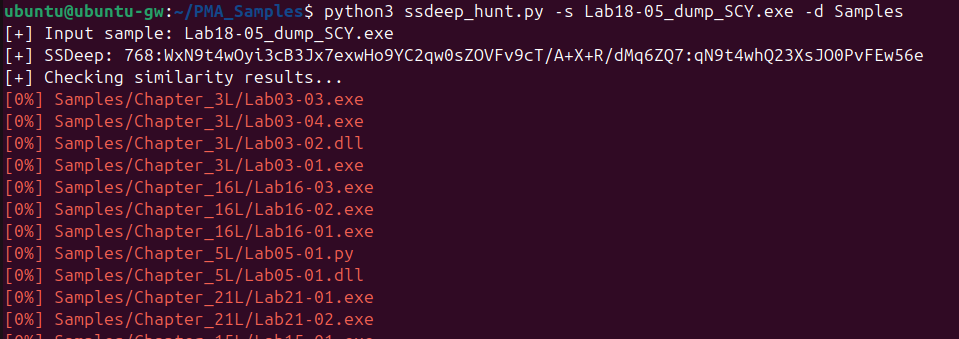
It was a surprise that no similar samples whatsoever were returned by ssdeep. But, we can apply the second method covered in Lab18-04, which is using YARA.
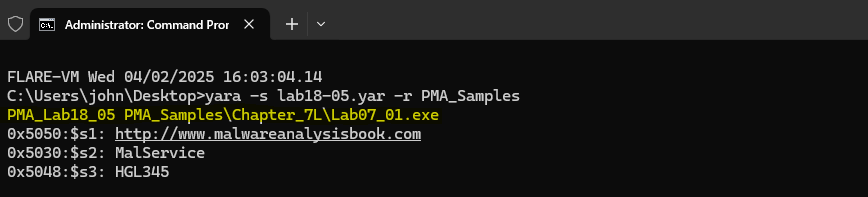
Opening the code in IDA Pro, it seems very simple, there aren’t any interesting custom parts like arithmetic operations on strings, etc., that could make up strong unique binary patterns, so I tried my luck with some interesting strings. After running the rule against the PMA Sample dataset, only one match was returned, which is Lab07-01.exe:
We can confirm once again using BinDiff:
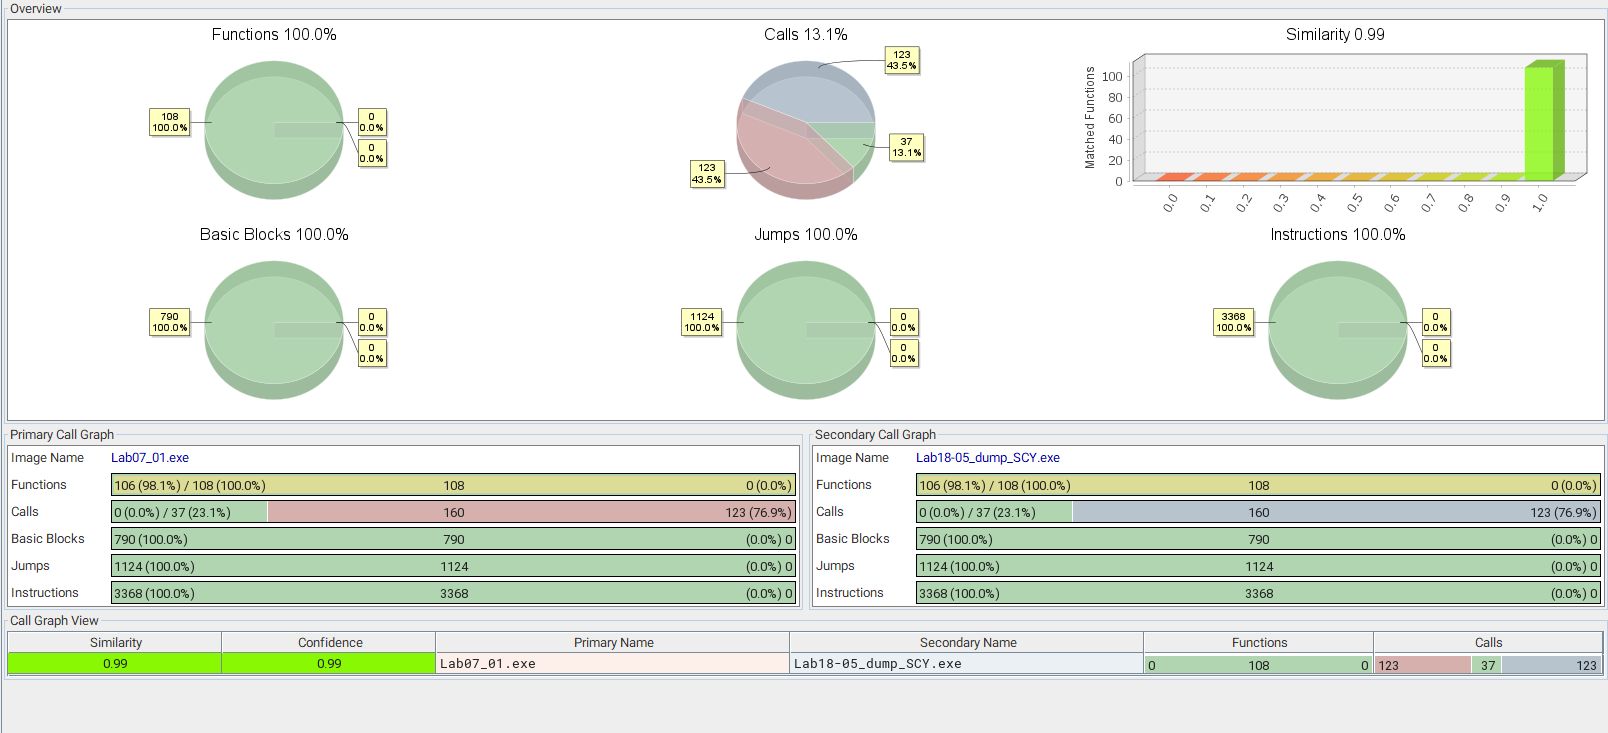
Just like the previous Labs, the matches are nearly perfect:
- Similarity and confidence in the results is 0.99, which means that both samples are almost identical.
- The similarity between functions, basic blocks, jumps and instructions is 100%.
- The only difference here is in terms of calls, and likely because of the stub part of the code that still resides in the unpacked code.
This confirms that Lab07-01.exe is the sample packed into Lab18-05.exe.