PMA Lab 18-04: Packers and Unpacking
Your goal for the labs in this chapter is simply to unpack the code for further analysis. For each lab, you should try to unpack the code so that other static
Lab 18-04
Your goal for the labs in this chapter is simply to unpack the code for further analysis. For each lab, you should try to unpack the code so that other static analysis techniques can be used. While you may be able to find an automated unpacker that will work with some of these labs, automated unpackers won’t help you learn the skills you need when you encounter custom packers. Also, once you master unpacking, you may be able to manually unpack a file in less time than it takes to find, download, and use an automated unpacker.
Each lab is a packed version of a lab from a previous chapter. Your task in each case is to unpack the lab and identify the chapter in which it appeared.
The files are Lab18-01.exe through Lab18-05.exe.
Notes
This is an interesting challenge, to which I would like to extend the difficulty, and increase realism.
- As recommended in the Lab guide, using automated unpackers won’t help learn the required skills, so I won’t be using any automated tools.
- As per the Lab guide, each lab is a packed version of a lab from a previous chapter. However, I won’t be checking one by one or fully analyzing the code on each file just to see if I remember the exercise. Instead, I will expand some of the content that is not necessarily covered in Practical Malware Analysis.
- In this exercise we already know that all files are packed, however, in real scenarios we don’t. Here I’ll briefly analyze each file and confirm how one could get to the conclusion that they are packed, and which packer is used. From there, I’ll start the unpacking process.
Unpacking
Using PEStudio, it is possible to find out that this file is packed with AsPack v2.12.
- The file has a very high entropy (7.555)
- Regarding sections there are two sections named .aspack, and .adata. The entrypoint is on .aspack.
- There are several strings, but irrelevant.
- There are not many imports and the majority are imports usually used in Unpacking routines (LoadLibrary, and GetProcAddress). There are four other imports, from different libraries (OpenSCManagerA from advapi32.dll, shutdown from ws2_32.dll, ShellExecuteA, from shell32.dll, and GetModuleHandleA from kernel32.dll). This may indicate that the Packer left one import function from each DLL contained in the Original Import Table.
Aspack employs techniques to make it difficult to unpack the program, such as self-modifying code, which can make it hard to set and hit breakpoints.
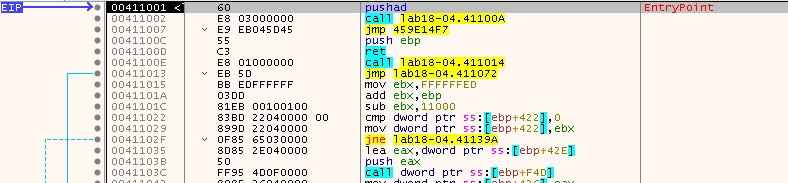
After opening the Malware in x32dbg it is possible to see the EntryPoint is a pushad instruction, which will push into the stack all the general-purpose registers:
We can use this to our advantage. By executing this instruction, we will see the addresses on the stack to which the registers have been pushed:
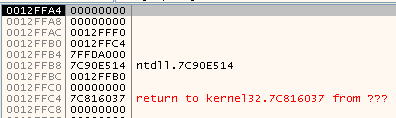
We can set an Hardware breakpoint (on access) to any of these. When the corresponding popad instuction is executed, the CPU will access the memory addresses to restore the values on the registers. This will make our hardware breakpoint to be triggered:
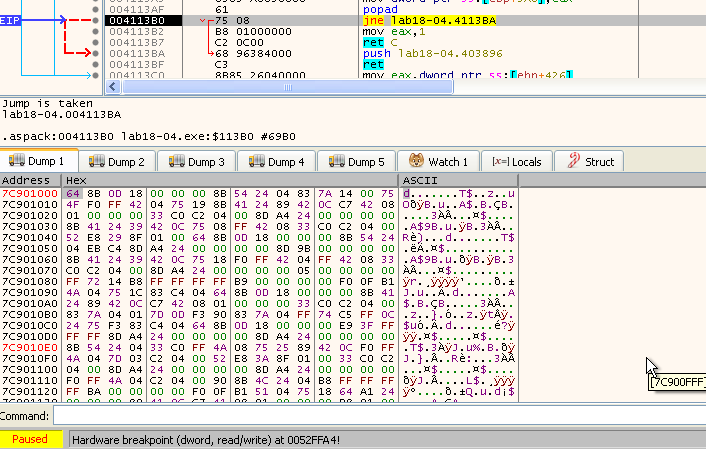
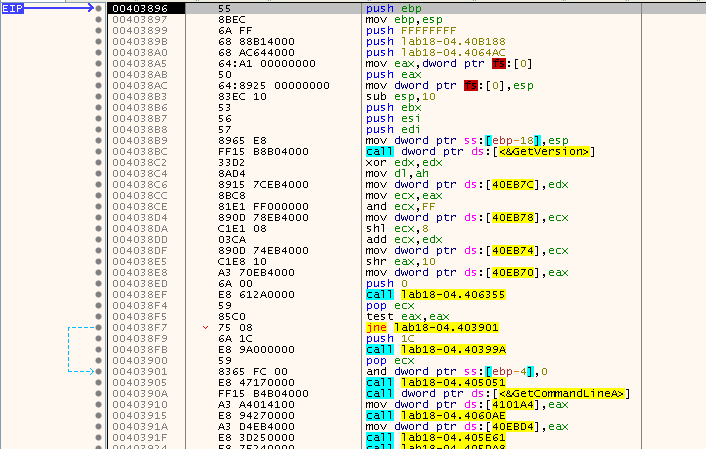
Typically, by now the EIP is near the jump tail, after stepping over the popad instruction. And we can see an address being pushed to the stack followed by a ret instruction. Executing this return, the code just to the address pushed into the stack, which lies in a whole different section, and this clearly looks like our OEP:
Time to dump the sample, and for this let’s use Scylla:
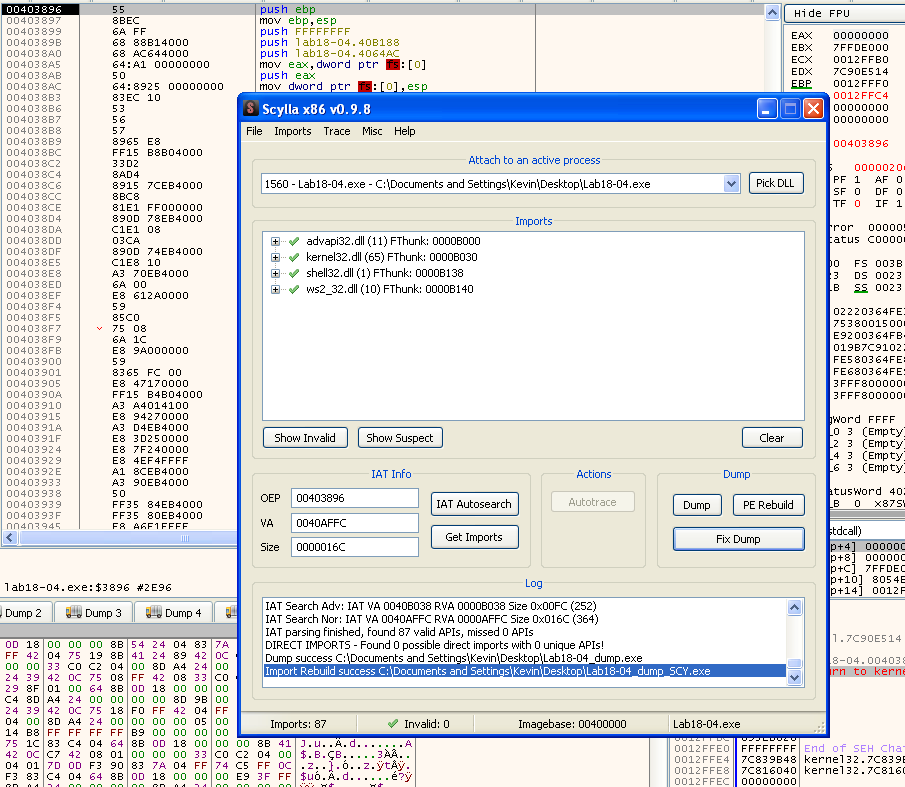
Opening the unpacked sample in PEStudio, we can see that there’s no packer signature:
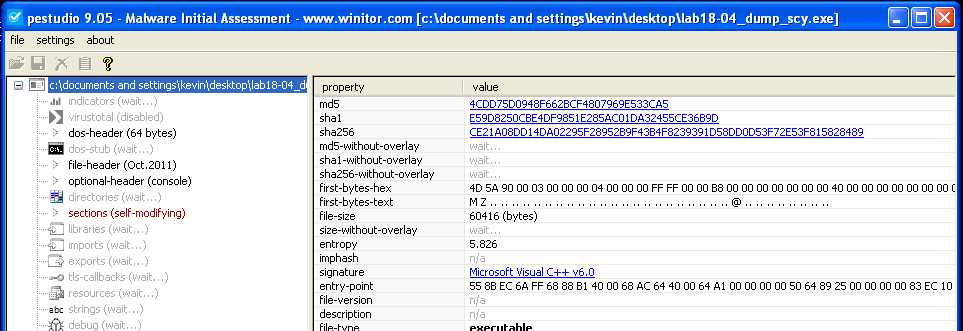
We can read some interesting strings:
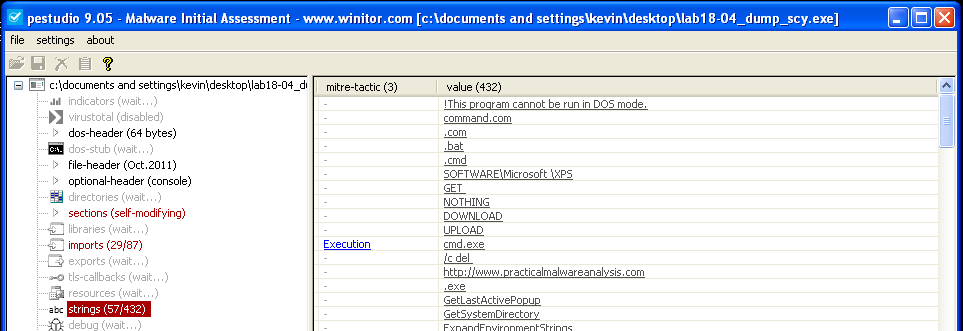
And also, there are a lot more imports:
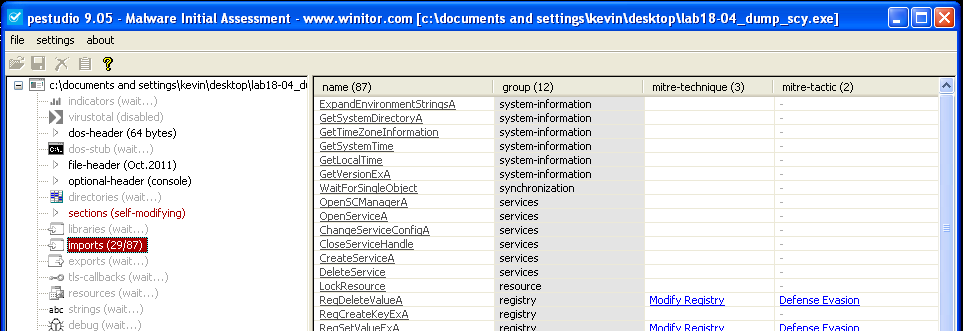
Executing the unpacked sample was possible, and by doing so it got deleted.
Finding the original sample
In order to find out the original Sample I’ll stick to the method I used in Lab18-01. I’ll start by using ssdeep to compare the unpacked sample against the entire PMA Sample dataset, and find the likely candidates:
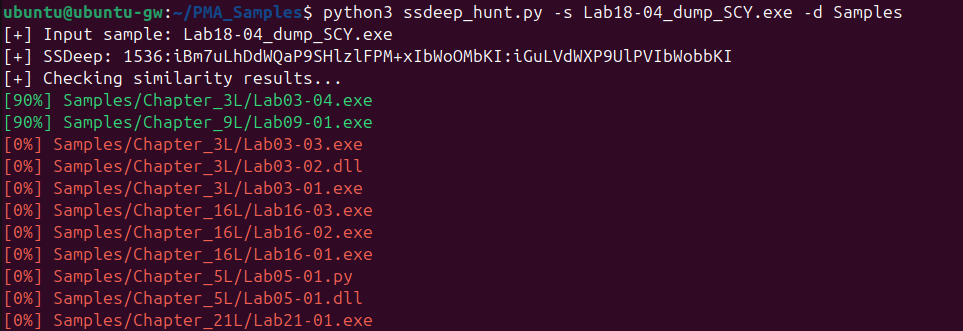
Here we have two candidates with a 90% match, which is actually just one since Lab09-01.exe is a copy of Lab03-04.exe:

Just like in Lab18-03, all other samples, including the packed version, have a 0% match. And once again this is very likely due to the self-modifying code altering the unpacking stub during execution. Since the code has changed the sample is dumped, those instructions no longer resemble its original static form.
Once again, in order to confirm if the top candidate returned by the triage using ssdeep, let’s use BinDiff:
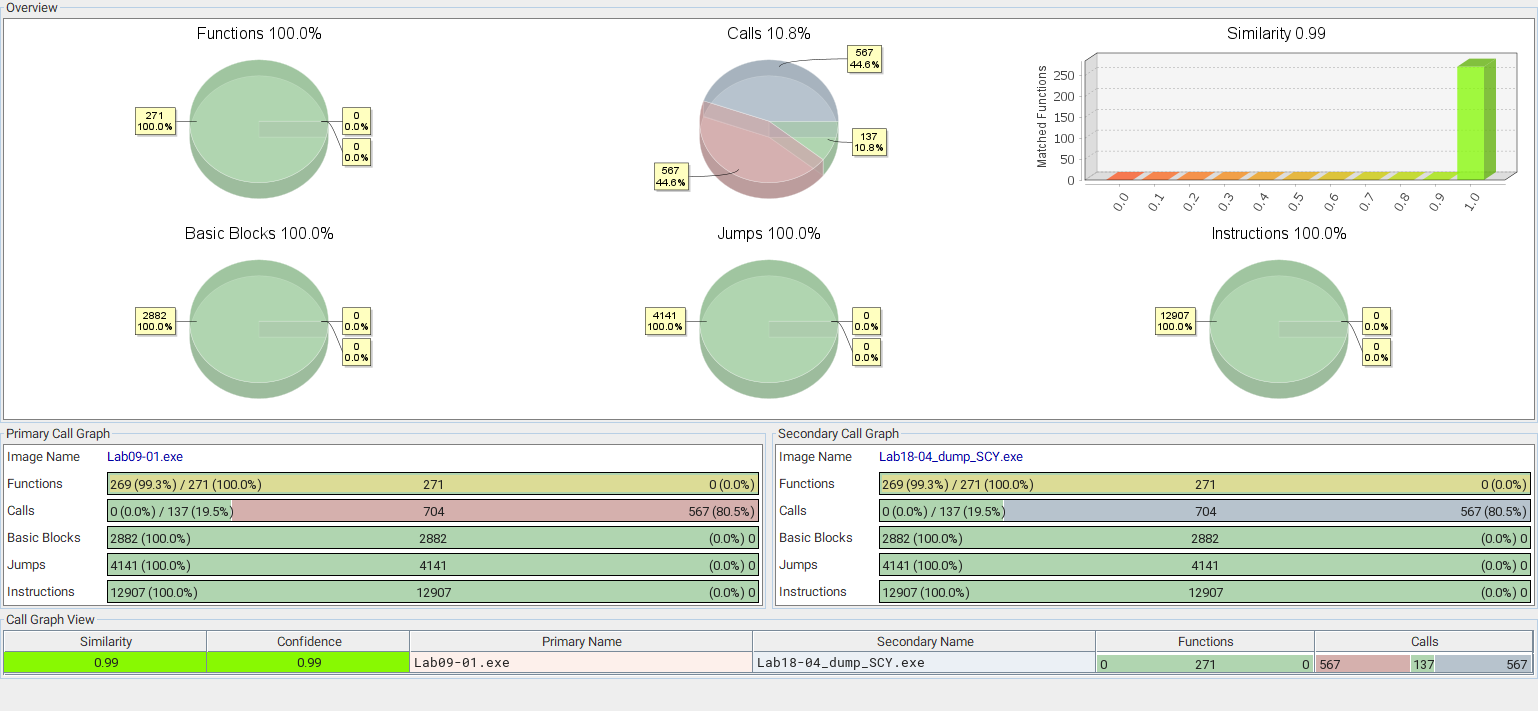
From the results, we can find out that:
- Similarity and confidence in the results is 0.99, which means that both samples are almost identical.
- The similarity between functions, basic blocks, jumps and instructions is 100%.
- The only difference here is in terms of calls. But this is likely because of the stub part of the code that is still present in the unpacked code.
With this, we it’s possible to conclude that Lab09-01.exe is the sample packed into Lab18-04.exe.
BinDiff is really a good comparison tool for binary files. But what if the initial ssdeep triage generated dozens or hundreds of candidates? Specially because of partial matches because of Packer stubs? Should we user BinDiff on all of them?
In the case of Lab18-03, and Lab18-04, the packer stub wasn’t a problem, but nevertheless I thought of introducing here another tool that I like and isn’t covered in Practical Malware Analysis, which is YARA. According to their description YARA is “the pattern matching swiss knife for malware researchers”.
It is a pattern-matching tool used by security researchers and malware analysts to identify and classify files based on textual or binary patterns. It allows the creation of flexible rules to detect malware families, indicators of compromise, or specific behaviors within files, memory, or network traffic.
For this particular use-case we can hunt on the PMA sample dataset for similar Malwares by matching unique strings, byte sequences, etc. I won’t go over the details because that would require a post of its own, but you can find more information here.
By creating a specially crafted rule with strings and binary parts extracted from the unpacked sample, we can be confident that it only triggers similar samples, and the comparison is focused on what we wan’t, avoiding finding matches or similarities in the packer stub.
I chose to use some of the strings seen in the Malware, but also part of binary functions that seem custom. Obviously, if I had chosen binary patterns that do not seem unique, these could lead to false positives. In total I chose 6 strings and 7 binary patterns, and the rule has to match them all.
By running the rule against the dataset, it is possible to see two matches, both highlighted in yellow: Lab03-04.exe and Lab-09-01.exe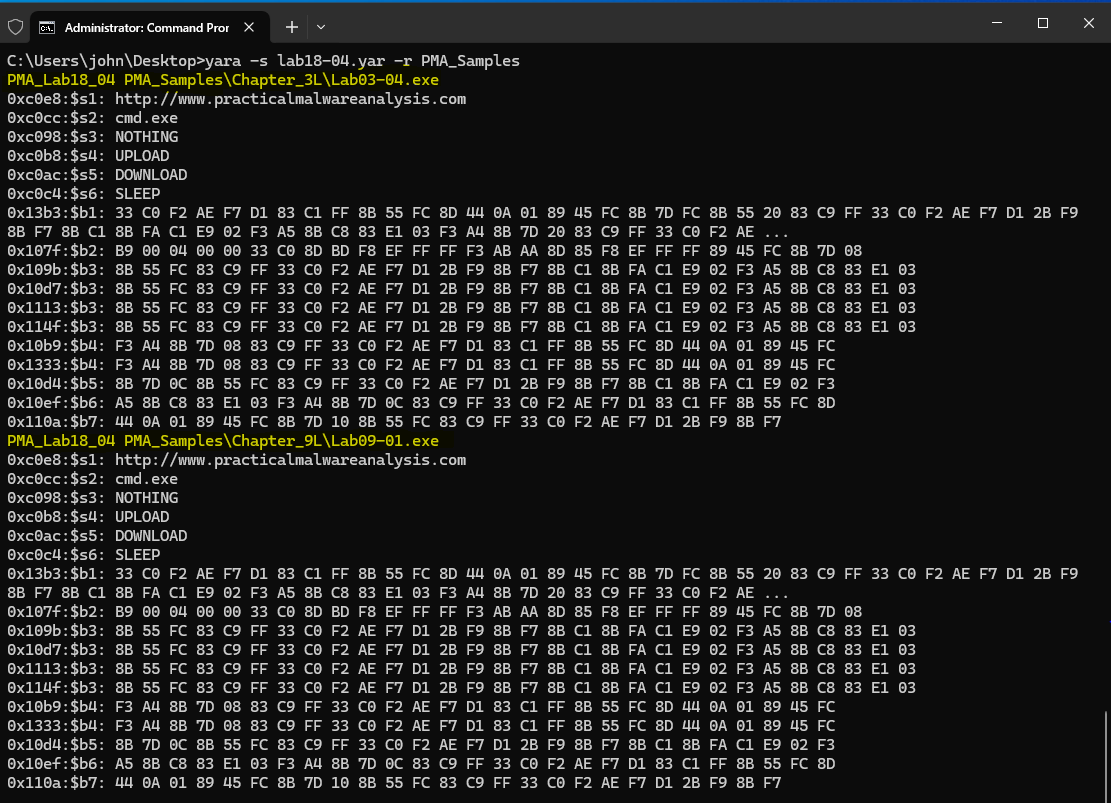
The other lines represent what has matched on those files, and the offsets of those strings/instructions.